Create a Fully Loaded, Free Active Directory Lab in 15 Minutes
Posted on September 17, 2020 by David Rowe ‐ 5 min read

Active Directory Lab
With a populated and isolated Active Directory, you can run, develop, and test on a domain without any adverse reaction to a production environment. Run tests to see if the security tools you bought actually work! You can set up red and blue team exercises without needing to attack and defend your real domain! Have you ever needed a simple repeatable method for creating an Active Directory honeypot in your DMZ? Make a domain after lunch for an afternoon adventure, and tear it down before you walk to your afternoon happy hour.
These steps are simple and repeatable.
This fifteen minute lab generates a simple one server Active Directory Domain for testing with users, groups and computers.
Prerequisites:
- A cloud account. I’ll be using AWS for this lab. You can use Azure or GCP or any other provider.
- Access to the Badblood repo
- A keyboard and an internet connection.
Step 1: Create and Configure an Virtual Machine
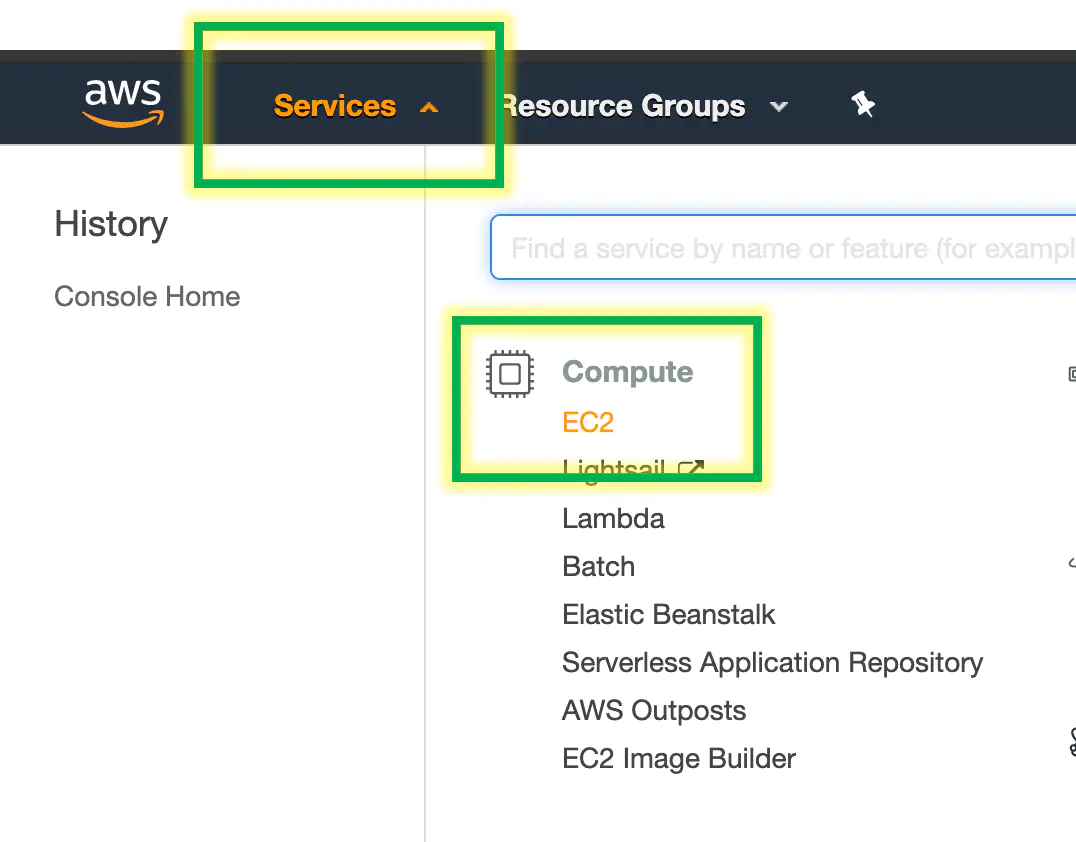
Log into your cloud provider and create a new server. Go to the EC2 service in AWS
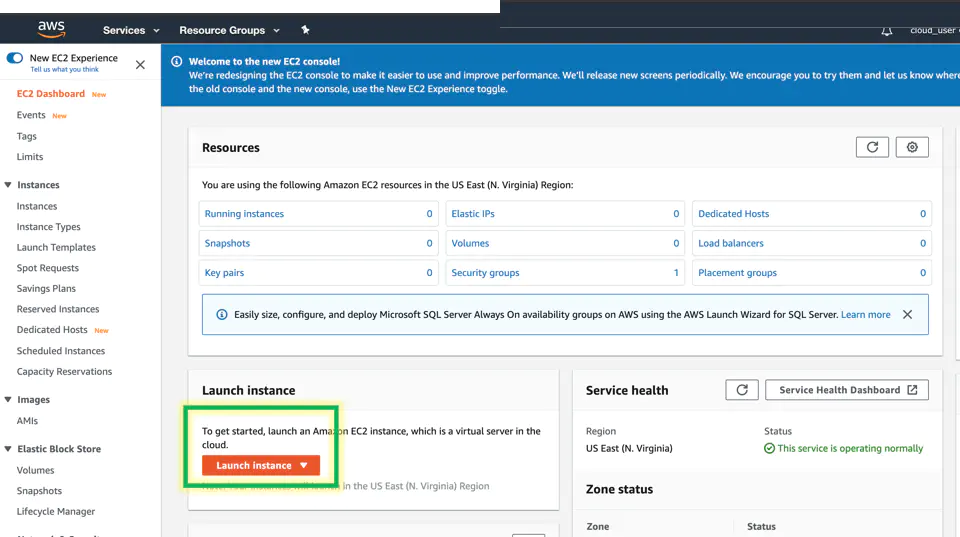
Click launch instance
Scroll down and choose a Windows server image. At the time of the post, Server 2019 is the standard base image. Click next

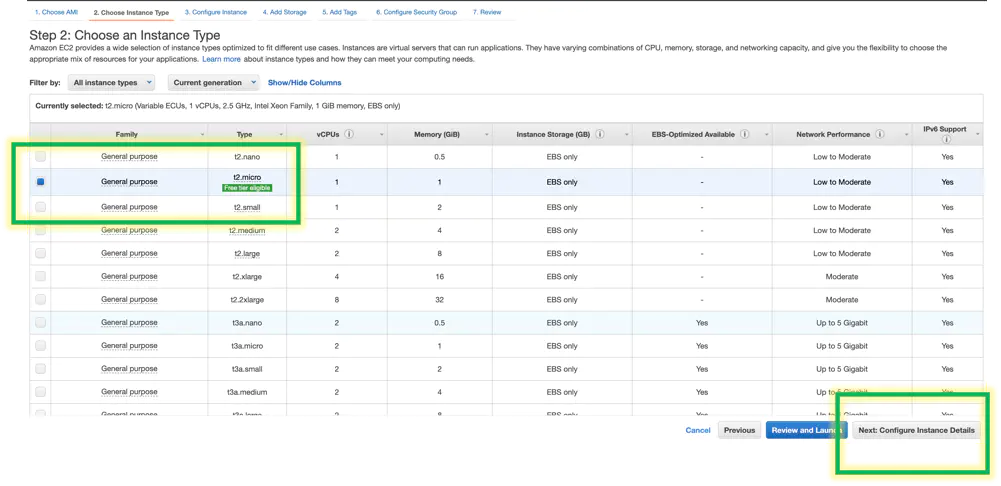
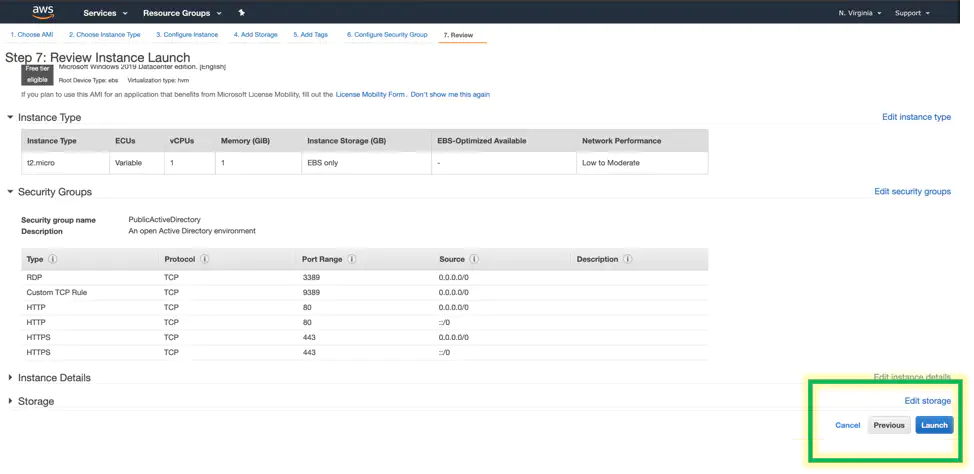
Choose a size for the lab. To run through the steps and get he job done quickly and efficiently, free tier works for this lab. T2 medium works and is ok too but costs more dollar bills per month. If you are going to be doing intensive memory tests on your domain, pick an M or R class. Click next
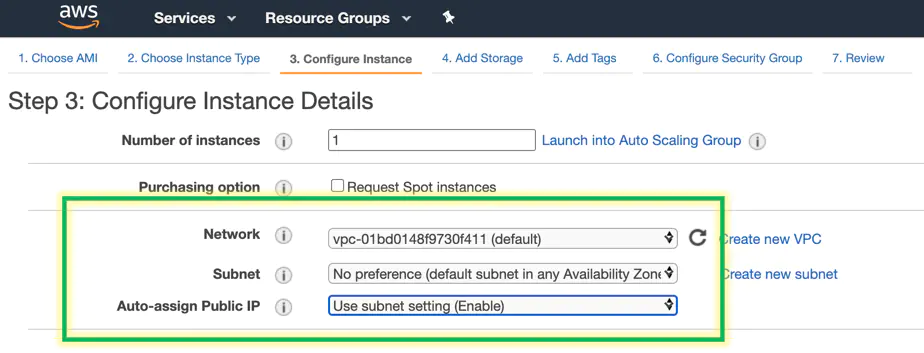
This lab, I put the disgustingly small and petty server on a public network, public subnet and assign it a public IP. (I deleted it later) Click next
The hard drive size doesn’t need to be grandiose for this project. A simple 30gb hd will do. Slap a bigger one on there if you want a bigger bill. Click next

Give your machine a name via a Name tag with a value. Here I made my name ‘TesterDomain’. Click next

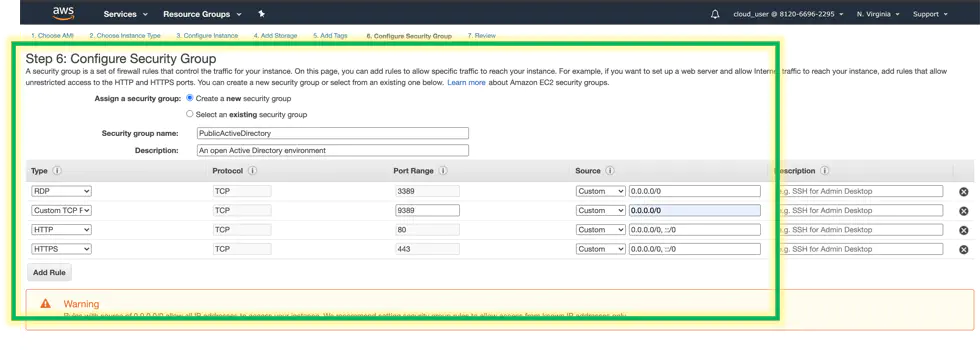
Configure the security group. For rdp access you’ll need to allow port 3389 from your IP. If you want to make this a public honeypot you can open this up to the world.
Get a little crazy and open up 9389 too for powershell active directory remote management.
Go all out and open up ports 80 and 443 if you are going to enable powershell web access. Click next
Choose a key pair to use. In this demo, I made a new key pair, and downloaded it to my Mac.
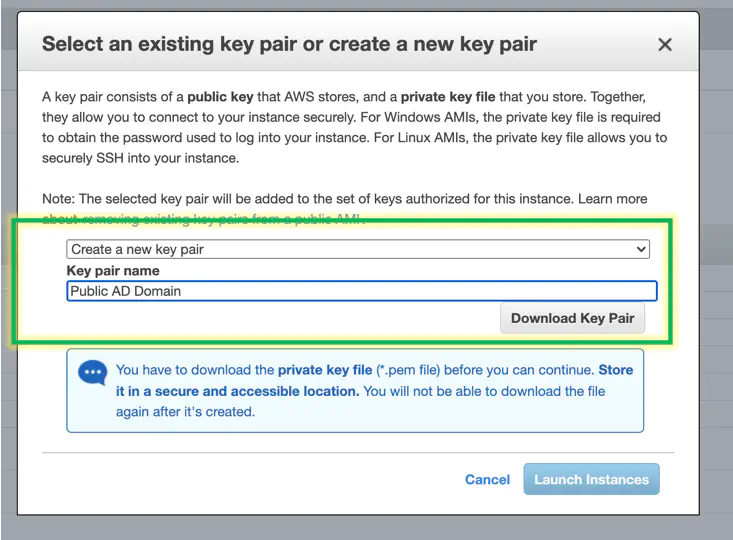
After you download the key pair, launch the machine
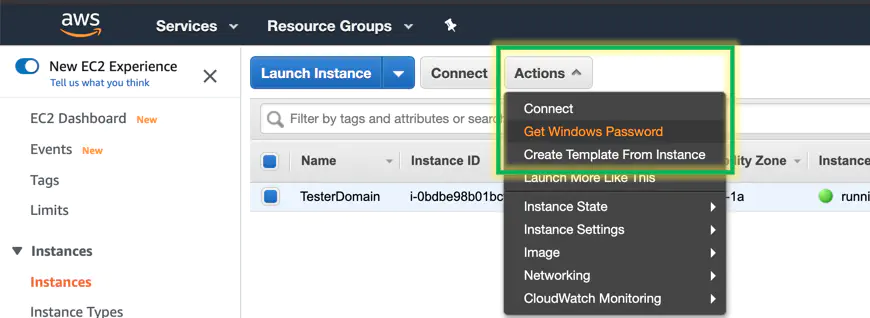
Once the machine is up and running, grab the admin password and rdp into it.
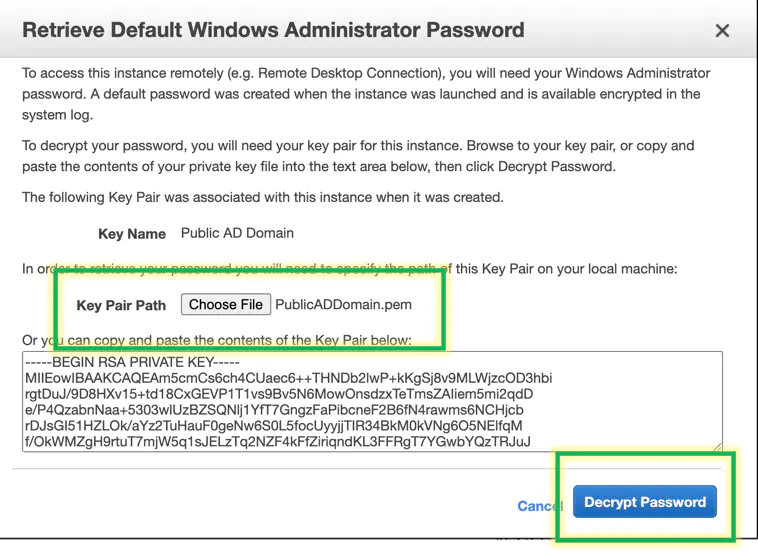
Put your key pair in the fancy window and decrypt the password.
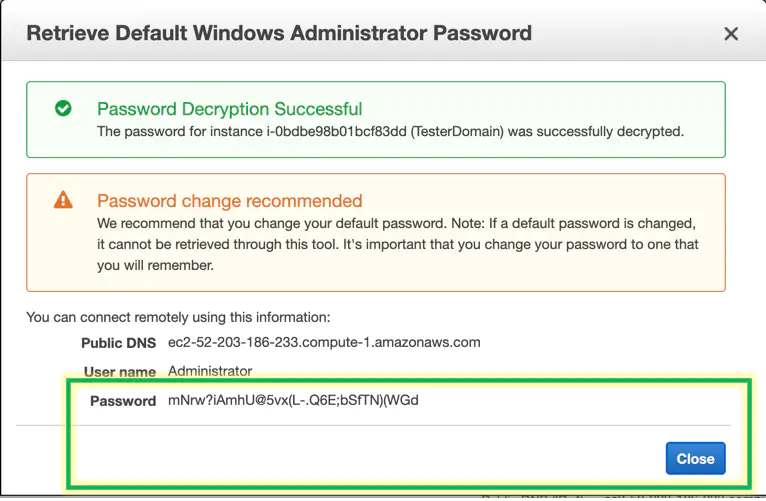
And here’s the public name and password for the machine.
The machine is destroyed as of 9/15 12:00 pm. Have a fun time attempting to log into it.
Set up the connection to the machine with your favorite RDP tool.
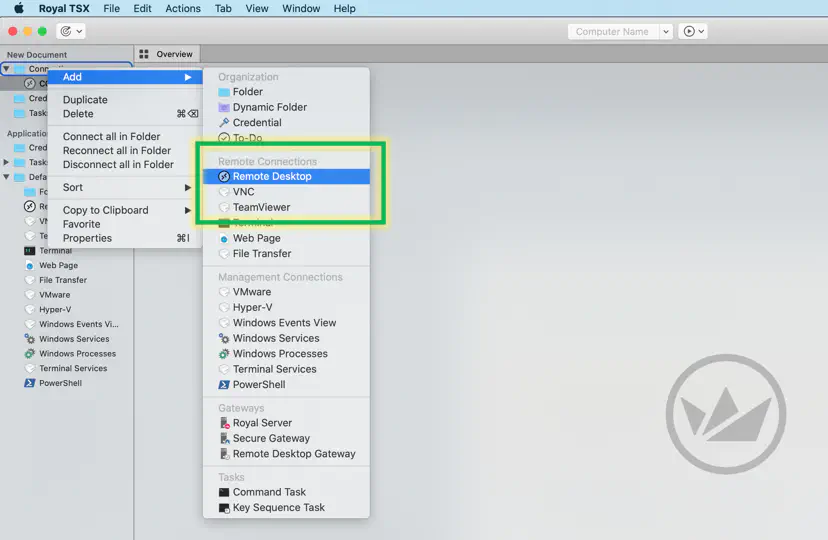
Configure your machine’s info
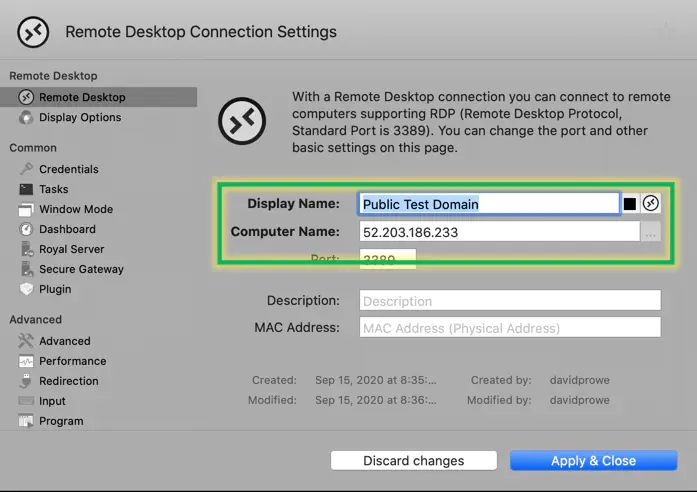
If you need help getting the computer name, put the public IP address found in the AWS console.

Enter the credentials into your RDP tool. Then connect.
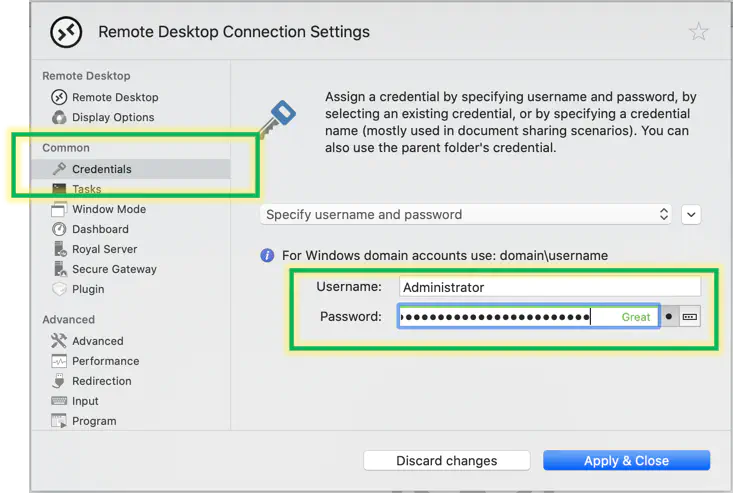
Step 2 Download Scripts and Create a domain
Once you are authenticated into the EC2,
Disable ie enhanced security via powershell.
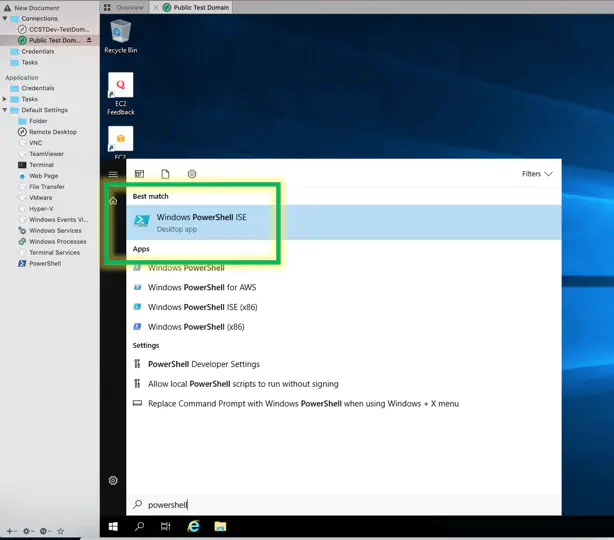
Code:
function Disable-InternetExplorerESC {
    $AdminKey = "HKLM:\SOFTWARE\Microsoft\Active Setup\Installed Components\{A509B1A7-37EF-4b3f-8CFC-4F3A74704073}"
    $UserKey = "HKLM:\SOFTWARE\Microsoft\Active Setup\Installed Components\{A509B1A8-37EF-4b3f-8CFC-4F3A74704073}"
    Set-ItemProperty -Path $AdminKey -Name "IsInstalled" -Value 0
    Set-ItemProperty -Path $UserKey -Name "IsInstalled" -Value 0
    Stop-Process -Name Explorer
    Write-Host "IE Enhanced Security Configuration (ESC) has been disabled." -ForegroundColor Green
}
Disable-InternetExplorerESC

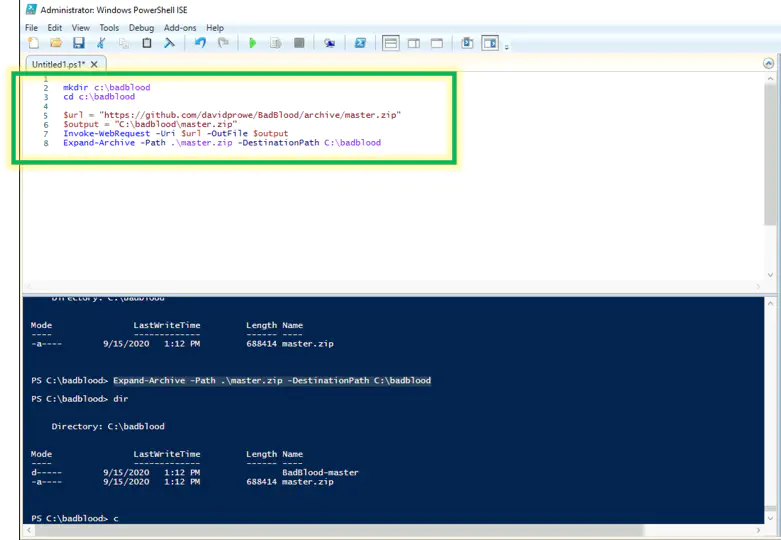
Powershell code for that:
mkdir c:\badblood

cd c:\badblood

$url = "https://github.com/davidprowe/BadBlood/archive/master.zip"

$output = "C:\badblood\master.zip"

Invoke-WebRequest -Uri $url -OutFile $output

Expand-Archive -Path .\master.zip -DestinationPath C:\badblood
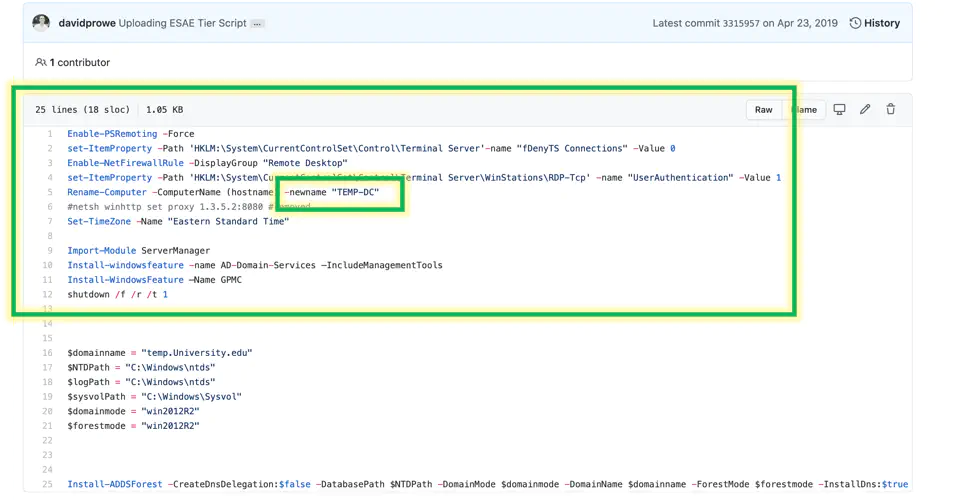
Install an active directory domain - sample script from my Sec Tools Git Repo https://github.com/davidprowe/AD_Sec_Tools/blob/master/AD_domain_CreateNewDomain/defaultNewDomainCreation.ps1
Run lines 1-12 which installs some prerequisites on the server. It also forces a restart of the server. Notice line 5 gives the server a new name of “Temp-DC”. Change that line if you want a fancier name.
Code:
Enable-PSRemoting -Force
set-ItemProperty -Path 'HKLM:\System\CurrentControlSet\Control\Terminal Server'-name "fDenyTS Connections" -Value 0
Enable-NetFirewallRule -DisplayGroup "Remote Desktop"
set-ItemProperty -Path 'HKLM:\System\CurrentControlSet\Control\Terminal Server\WinStations\RDP-Tcp' -name "UserAuthentication" -Value 1
Rename-Computer -ComputerName (hostname) -newname "TEMP-DC"
#netsh winhttp set proxy 1.3.5.2:8080 #removed
Set-TimeZone -Name "Eastern Standard Time"

Import-Module ServerManager
Install-windowsfeature -name AD-Domain-Services –IncludeManagementTools
Install-WindowsFeature –Name GPMC
shutdown /f /r /t 1
Once the server is restarted, edit line 16 with the domain name of your choice, and run lines 16-25
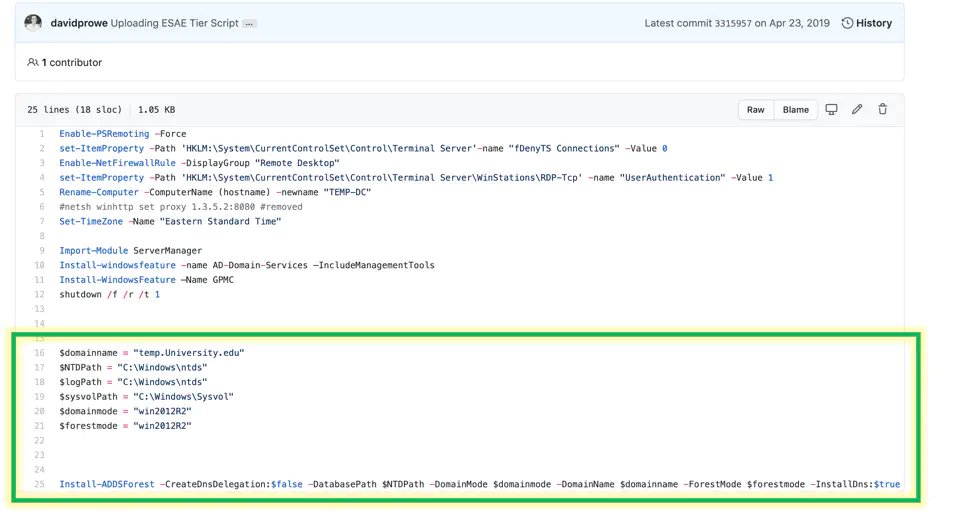
Code:
$domainname = "badblood.com"
$NTDPath = "C:\Windows\ntds"
$logPath = "C:\Windows\ntds"
$sysvolPath = "C:\Windows\Sysvol"
$domainmode = "win2012R2"
$forestmode = "win2012R2"

Install-ADDSForest -CreateDnsDelegation:$false -DatabasePath $NTDPath -DomainMode $domainmode -DomainName $domainname -ForestMode $forestmode -InstallDns:$true -LogPath $logPath -NoRebootOnCompletion:$false -SysvolPath $sysvolPath -Force:$true


Open the invoke-badblood script found in your C:\Badblood directory.
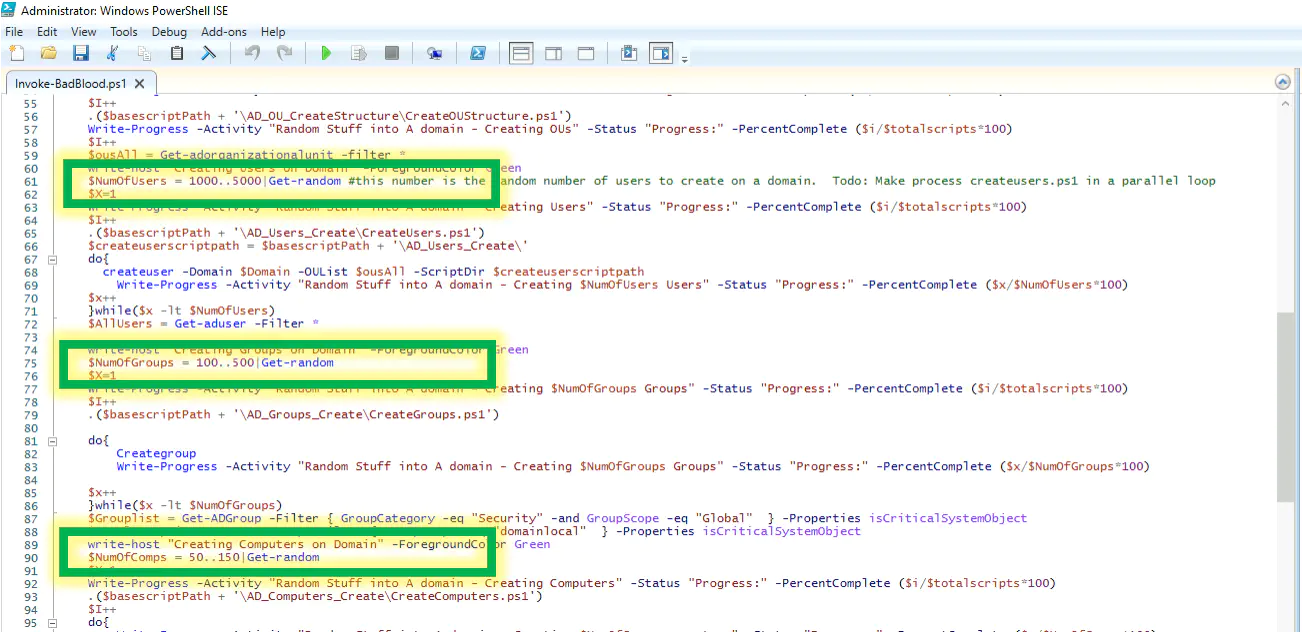
For a very quick deployment, limit the number of users, groups, and computers by editing the following lines in invoke-badblood.ps1
- User line to edit : 61
- Group line to edit : 75
- Computer line to edit : 90
Run the code
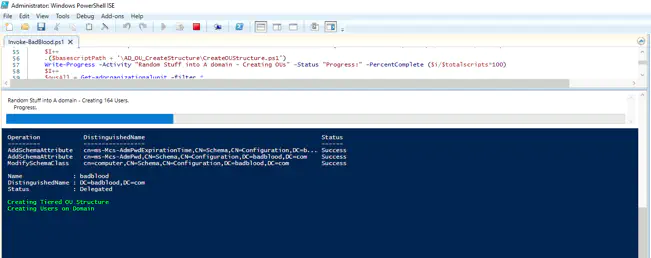
That’s it. You are done. You now have a domain controller with stuff in it on a DMZ. Feel free to send the up address of you domain to your friends, and have fun.
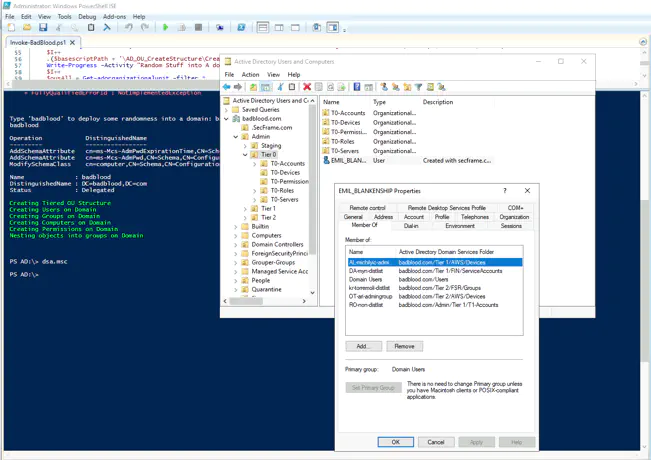
The above screenshot shows a sample mess of data in the Admin OU. For information on how to store your administrators the best way in your AD, read why Aren’t your administrators in one place
If you are familiar with start up scripts using AWS EC2 ‘User data’, here is the code to perform most of the items outlined in step 2. Disables IE Enhanced security, automate the badblood download and preps the server to turn into a domain controller.
<powershell>

$AdminKey = "HKLM:\SOFTWARE\Microsoft\Active Setup\Installed Components\{A509B1A7-37EF-4b3f-8CFC-4F3A74704073}"
$UserKey = "HKLM:\SOFTWARE\Microsoft\Active Setup\Installed Components\{A509B1A8-37EF-4b3f-8CFC-4F3A74704073}"
Set-ItemProperty -Path $AdminKey -Name "IsInstalled" -Value 0
Set-ItemProperty -Path $UserKey -Name "IsInstalled" -Value 0

#download badblood

mkdir c:\badblood

cd c:\badblood

$url = "https://github.com/davidprowe/BadBlood/archive/master.zip"

$output = "C:\badblood\master.zip"

Invoke-WebRequest -Uri $url -OutFile $output

Expand-Archive -Path .\master.zip -DestinationPath C:\badblood

#rename and install prereqs

Enable-PSRemoting -Force

set-ItemProperty -Path 'HKLM:\System\CurrentControlSet\Control\Terminal Server'-name "fDenyTS Connections" -Value 0

Enable-NetFirewallRule -DisplayGroup "Remote Desktop"

set-ItemProperty -Path 'HKLM:\System\CurrentControlSet\Control\Terminal Server\WinStations\RDP-Tcp' -name "UserAuthentication" -Value 1

Rename-Computer -ComputerName (hostname) -newname "Badblood-DC"

#netsh winhttp set proxy 1.3.5.2:8080 #removed

Set-TimeZone -Name "Eastern Standard Time"

Import-Module ServerManager

Install-windowsfeature -name AD-Domain-Services –IncludeManagementTools

Install-WindowsFeature –Name GPMC

</powershell>

